After creating a ticket template in the Integration menu, you can then submit the ticket. This feature in Omnichannel utilizes the Ticket feature in CRM which allows users in the chatpanel to create tickets in CRM. However, this feature needs to be enabled on both products. Here are the steps.
- On the Inbox menu, select All chats submenu. Then, click one of the messages for which you want to create a ticket.
- In Room details, click "Submit ticket" in the Ticket section.
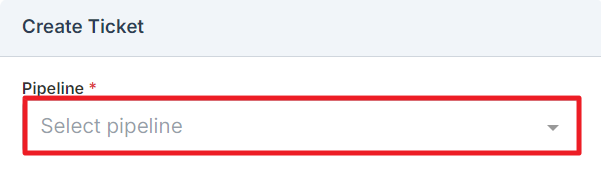
- Next, you will see the following pop-up and select the Pipeline you want.
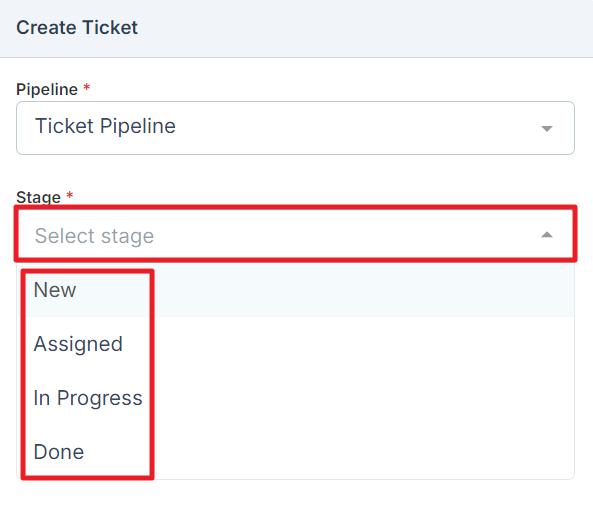
- Choose which stage you will enter the ticket at.
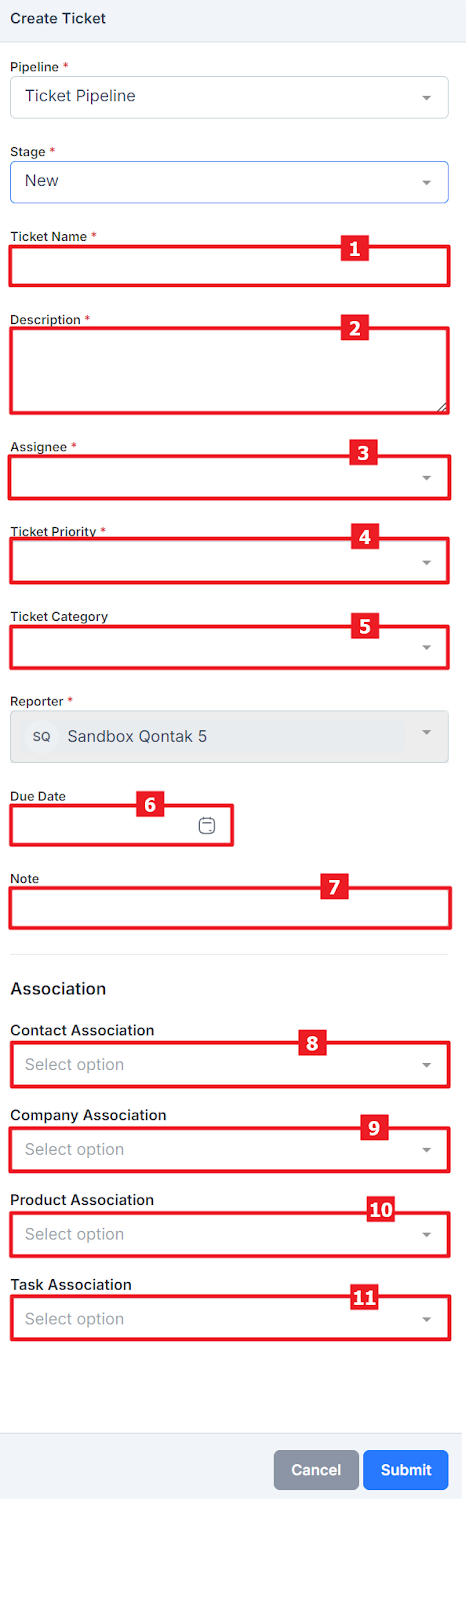
- Then another column will appear as follows.
Information:
No Column Explanation 1 Ticket name Enter the name of the ticket you want. 2 Description Enter the information description of the ticket. 3 Asignee Choose who the ticket will be assigned to. 4 Priority tickets Select the priority of the ticket. 5 Ticket Categories Select the category for the ticket. 6 Due date Set a deadline for the ticket. 7 Note Enter notes or notes (if needed). 8 Contact Association Select which contact to associate the ticket with. 9 Company Association Select which company the ticket will be associated with. 10 Product Association Select which product the ticket will be associated with. 11 Task Association Select which task the ticket will be associated with. - If so, click "Submit".
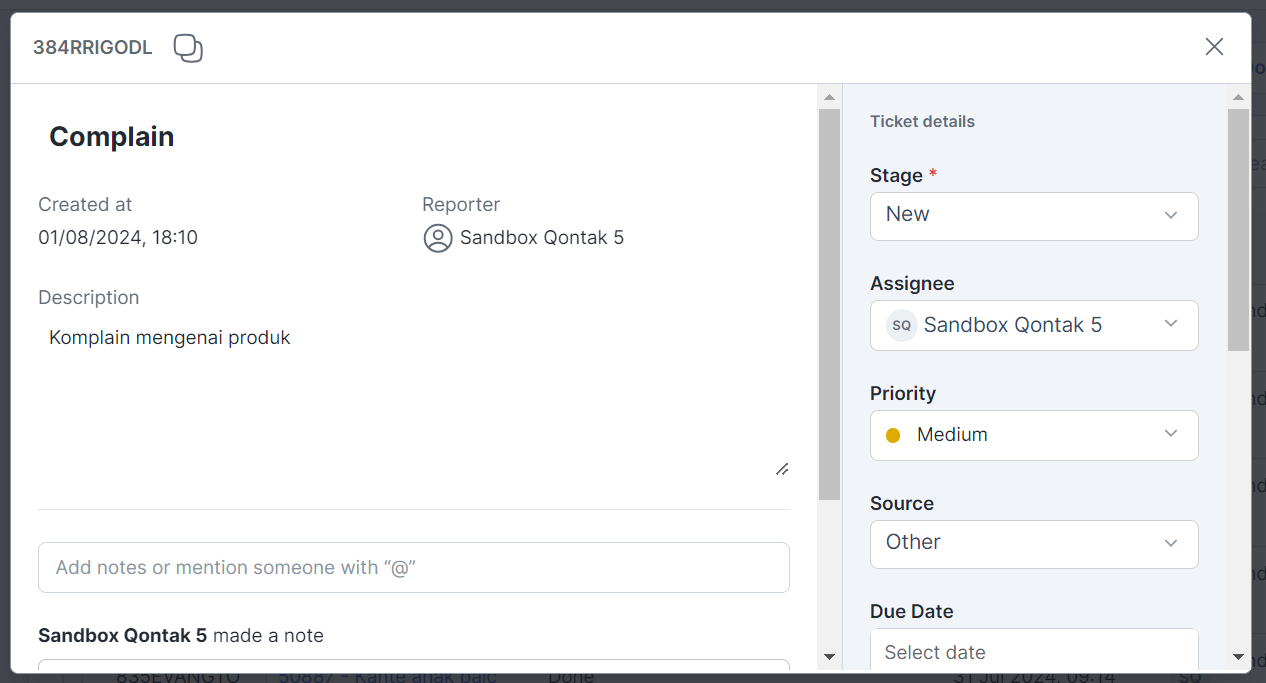
- Then the ticket has been successfully created, you can click "ticket number" to open the ticket in Qontak CRM.
- Tickets in Qontak CRM will look like this.