After integrating with Qontak CRM, you can create CRM Deals through the Inbox menu in the chat panel. Deals created in the chat panel will automatically appear in the Deals menu of Qontak CRM. Here are the steps.
Go to the Inbox menu.
Then select the "All chats" tab.
Next, choose one chat for which you want to create a deal.
In the Room detail, click “Create Deals”.
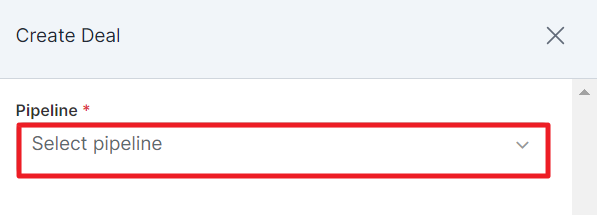
Select the pipeline you want.
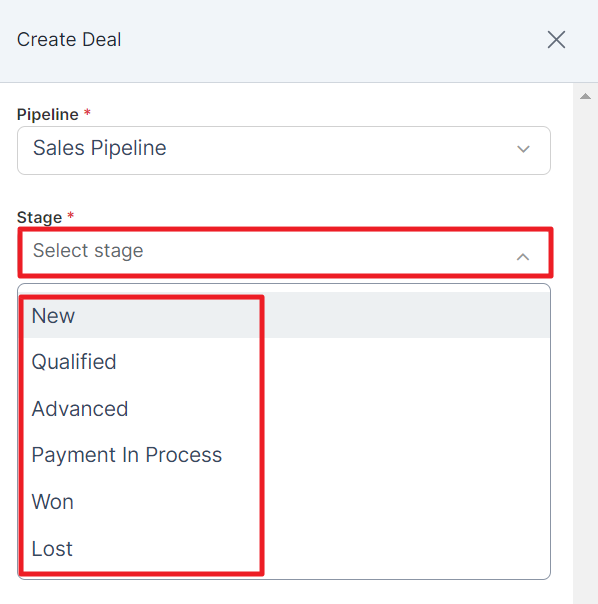
Choose the stage where the deal will be placed.
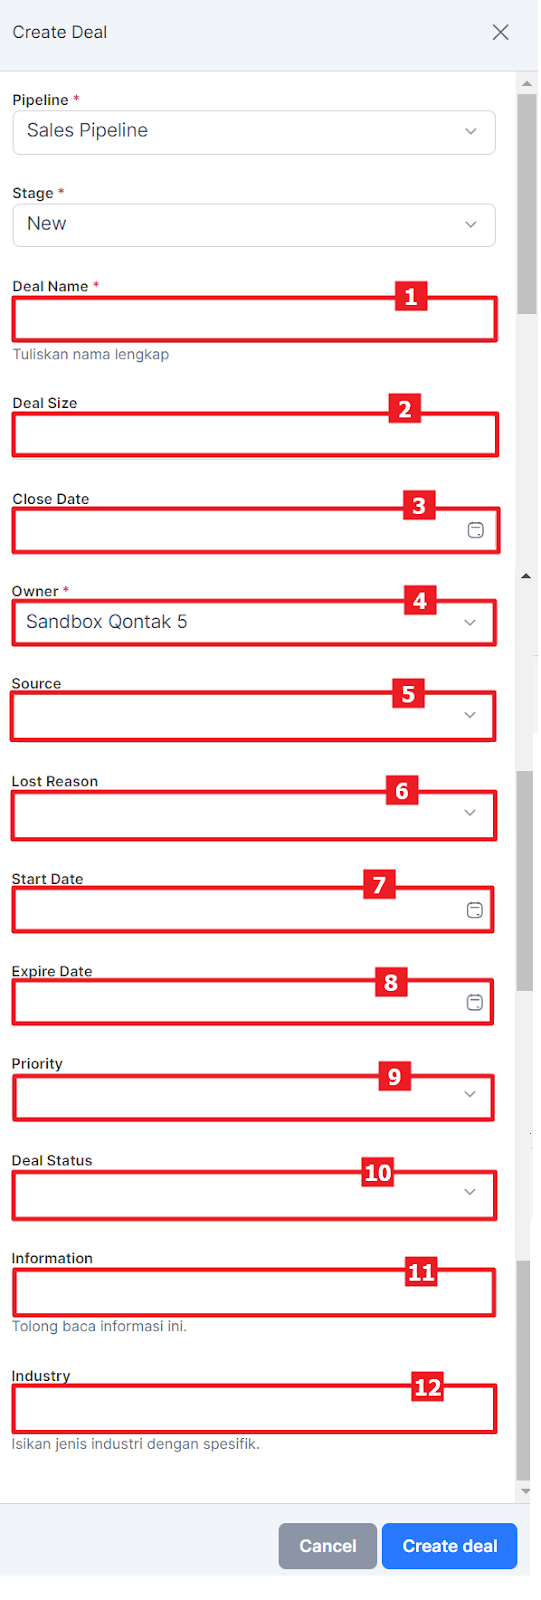
Next, additional information will appear as follows.
Description:
No Column Explanation 1 Deals name Enter the name of the deal you want. 2 Deal size Enter the size of the deal. 3 Close date Set the closing date for the deal. 4 Owner Enter the user responsible for the deal. 5 Source Enter the origin of the deal. 6 Lost reason If the deal fails, select the reason. 7 Start date Set the starting date of the deal. 8 Expire Set the expiration date of the deal. 9 Priority Choose the priority of the deal. 10 Deal status Select the status of the deal. 11 Information You can also enter other information if needed. 12 Industry Enter the industry type of the deal if needed. If all required information is filled, click “Create deal”.
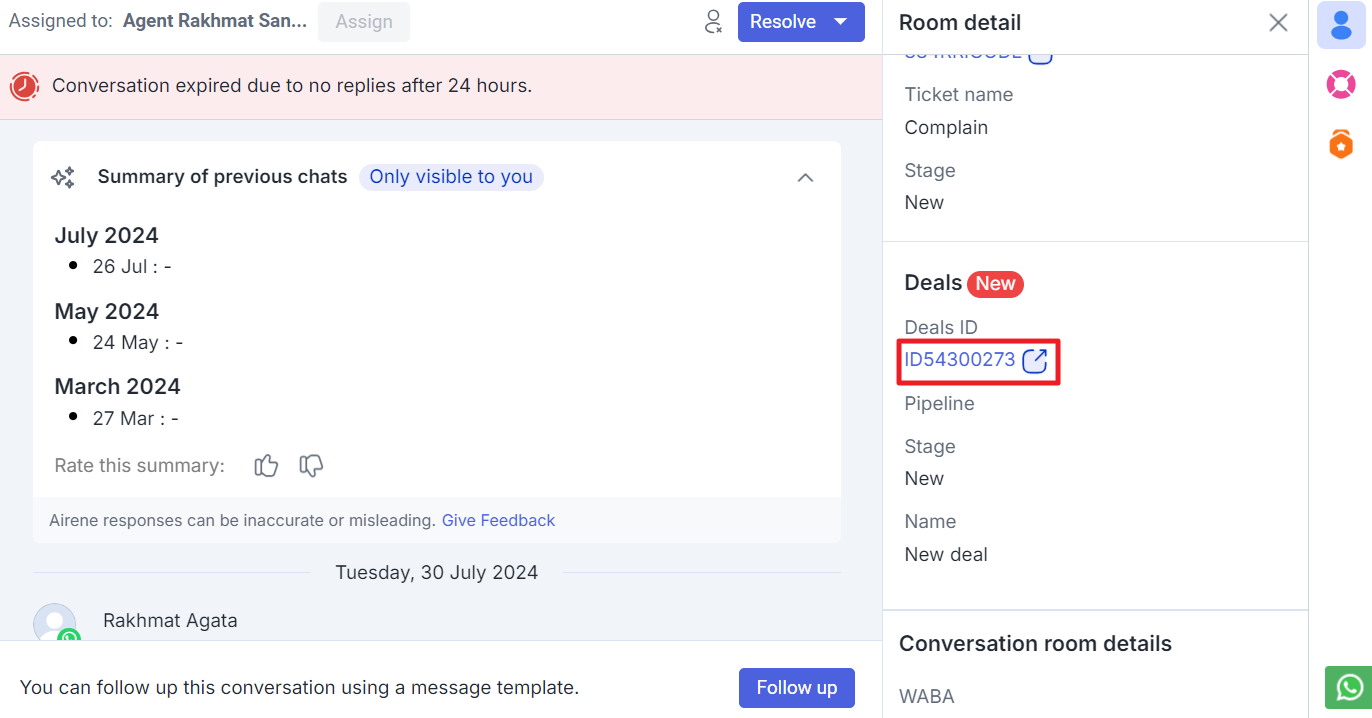
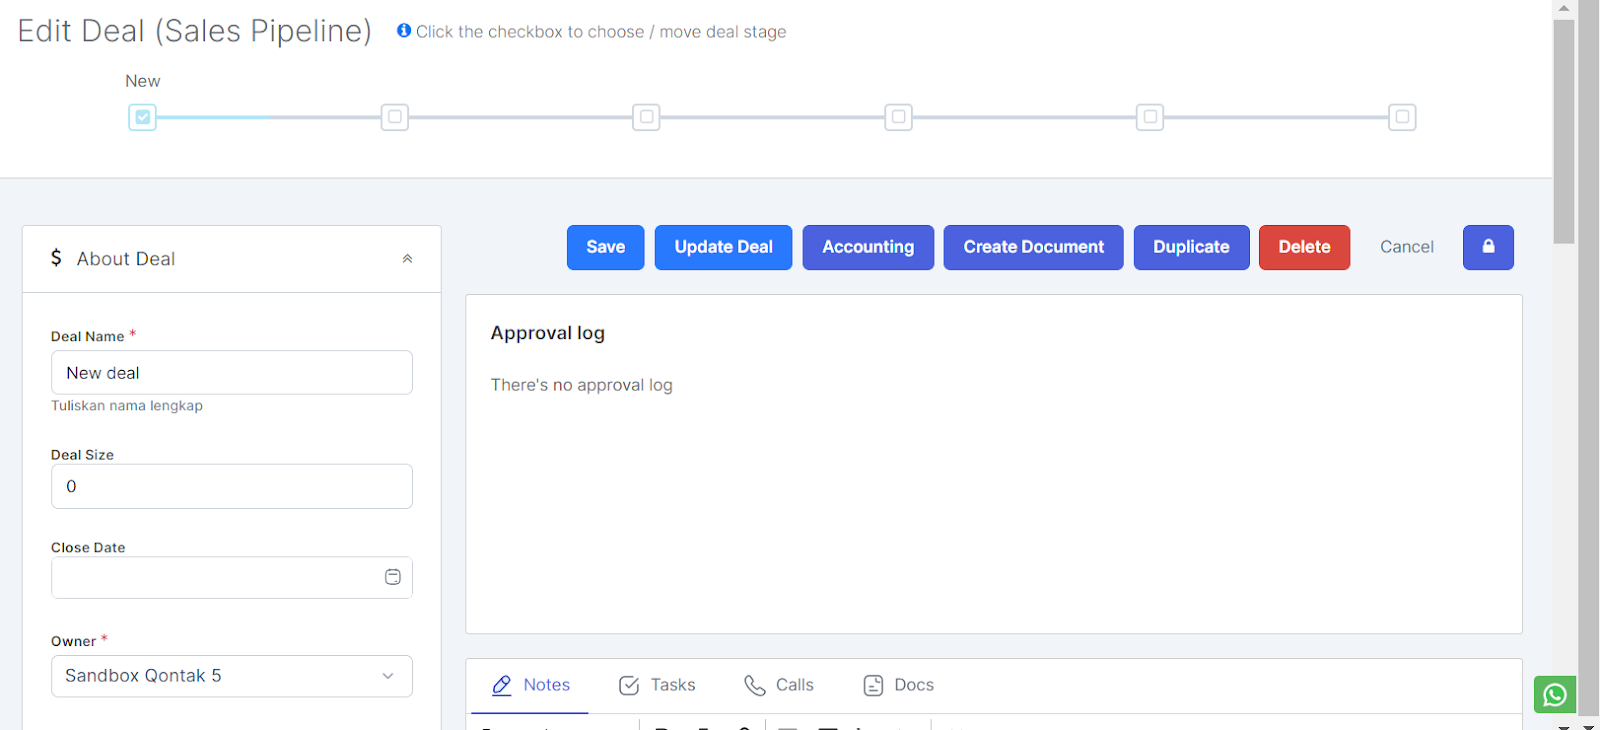
The deal has been successfully created. You can click “Deals ID” to open the deal in Qontak CRM.
The deal in Qontak CRM will look like this.
After integrating with Qontak CRM, you can create CRM Deals via the Inbox menu in Channel. Later, deals made on Chatpannel will automatically be entered in the Qontak CRM Deals menu. Here are the steps.
Masuk ke menu Inbox.
Lalu pilih tab "All chats".
Select one of the chats for which you will create deals.
In the Room detail, click “Create Deals”.
Select the pipeline you want.
Select the Stage where the deals will be entered.
Next, additional information will appear as follows.
Information:
No Column Explanation 1 Deals name Enter the name of the deal you want. 2 Deal size Enter the size of the deal. 3 Close date Determine the end date for the deal. 4 Owner Enter the user responsible for the deals. 5 Source Enter where the deals come from. 6 Lost reason If the deal fails, then select the reason. 7 Start date Determine the start date of the deal. 8 Expire Determine the end date of the deal. 9 Priorities Select a priority for the deals created. 10 Deal status Select the deal status. 11 Information You can also enter other information if necessary. 12 Industry If the required information has been filled in, click “Create deal”.
So the deal has been successfully created, you can click "Deals ID" to open deals on Qontak CRM.
Deals on Qontak CRM will look like this.